How to Pack Smart for a Trip
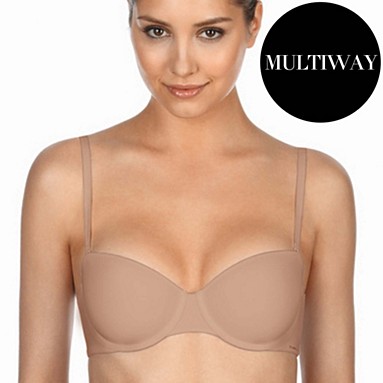
Small (Bra/Undies)
Keep everything natural nude so it will work under all clothes,
Even if you have a white top it's always best to wear a nude bra as it's less likely to be seen.
Multiway bras are always super handy to pack!
Clothes
Pick a colour scheme and stick to it.
Pick items that all match so you can vary your outfit without over packing,
I stick to these rules:
Black or Brown
Red or Pink
I never pick a brown top if I pack black shoe, or a red top with a pink jacket
My colour scheme is usually
Blacks,
Greys,
and a pop of colour usually Pink or Red.
But hey that's just me!

Make-up
Primer
Foundation
Concealer
Powder
Blush
Bronzer
Brow Pencil
Brow Gel
Eyeshadow Palette
Mascara
Eye Liner
Lipstick
Lipgloss
Brushes/Tools
 |
Foundation Brush or Sponge
Blush Brush
Powder/Bronzer Brush
Flat Eye-shadow
 Blending brush
Brow Brush
Eye lash Curler
Tweezers

Skin Care
Cleanser
Toner
Moisturiser
Lip balm

Hair Care
Shampoo/Conditioner
Leave in Conditioner/heat defence
Hair Brush
Hair gel or spray or creme
(Depending on hair type)


.jpg)


